Winter often means cracked, dry hands, broken nails and torn cuticles. In the outdoors you have cold air and wind while indoors you have heaters or air conditioning as well as electric blankets. To combat feeling cold you tend to have hotter and sometimes longer showers and one of my worst habits – washing up with bare hands in very hot water. Winter is particularly worse for me not only do I fight seasonal depression – but I find my skin is so much drier and consequently itchy because of habits associated with winter. This year I made a pact with my hands and my mind to kick this habit of hot water dish washing and adorn some rather pretty pink gloves. But it’s not enough if you want to ease the itchy skin and torn cuticle look.
So to give back those hands and nails a bit of tender loving care before spring rushes through our doors, here’s a quick guide to follow when you find that spare hour in your week and decide to treat yourself. Here are some photos from my recent hand and nail therapy afternoon as well as afternoon tea and biscuits – who could complain!
Before you begin grab yourself:
- a hand towel, a small tub or container big enough for your hand to fit and fill with warm water and a wash cloth.
- A manicure kit with cuticle or orange stick, clippers or nail scissors, a nail file, and 3 ways buffer (affiliate link).
- Nail polish remover, cotton squares, nail varnish (optional)
- mix up your scrub and hand mask if using
- a friend or two, because these events are much more fun when you do them with people you love
- remove any nail polish
1. Hand scrub – you can make these in advance and store them in pretty jars or containers. A scrub is so easy to make and there are a myriad of fragrances, spices or herbs that you can add to make it personal as well as healing for the skin.
Scrubs are basically made up of oil and sugar or salt. A hand scrub can be as simple as 1 tablespoon of oil (coconut, olive, sweet almond, avocado) mixed with 1 tablespoon sugar or salt. (This will make enough for 1 hand scrub treatment.) The oil will soothe and repair your skin and the sugar or salt will slough off the dead skin cells. Using essential oils can add a medicinal effect if the skin is cracked, chapped or spilt.
Here’s a quick guide for using essential oils:
Lemon: Antibacterial, soothes cuts and wounds. Also will lighten any stains on your hands.
Lavender: Antibacterial, can ease headaches, calm the nervous system, bruising, insect bites and itchy skin, scars and sores. Great to use just before bed as it promotes sleep.
Peppermint: Great for headaches, antibacterial, anti-inflammatory and analgesic + cooling and refreshing.
Tea Tree: Antibacterial, healing cuts, sores, wounds, insect bites, itchy skin.
Here are my favourite scrub recipes:
Tea tree or Peppermint Hand Scrub, Patchouli Scrub and Pumpkin Pie Spice Scrub
Start by giving your hands a gentle wash and then if using the 1 treatment scrub start by placing the sugar in the palm of your hand and then add a few essential oils into the sugar. Lastly add the oil and mix to combine. Rub the scrub all over your hands applying a little pressure to massage the scrub in. This will also aid blood circulation. Carefully wash off with the warm water and wash cloth. Empty your water and refill before you apply the hand mask.
2. Hand mask – Hand masks are just like a face mask except for your hands. They do the same things like lock in moisture, repair and heal soreness, cracks, cuts and dry patches and soothe itchiness and redness. The best masks are those that are made from food, that is you could eat the ingredients if you had to.
2 recipes to try:
No 1. Rolled Oats Mask
3 tablespoons rolled oats
3 tablespoons rose water/orange blossom water
2 tablespoons sweet almond oil or coconut oil
Bullet blender or mini food processor
Blitz the rolled oats into a meal then add the rosewater and the oil. Warm it gently in the microwave or in a double boiler. Making sure that mask is not too hot, apply it to both your hands and fingers. Wait for mask to fully cool and then scrap it off your hands and wash with warm water.
No 2. Lemon and Oil Mask
3 tablespoons Castor Oil
1 tablespoon Olive oil or Coconut oil
1 tablespoon lemon juice
Stainless steel bowl big enough for hands to fit
Saucepan
Place oils in a bowl over a double boiler or saucepan. Fill saucepan with boiling water and let the oils warm up over the boiling water for a few minutes. This should warm the oils to just the right temperature for your hands. Remove the bowl and test the temperature. Add the lemon juice.
Dip nails/hands into bowl and leave them in until oils have cooled (approx 15 mins). Wipe hands on a towel and then lightly massage in the oils. If needed, rinse hands in warm water and pat dry, carefully leaving a light layer of oil on the hands to penetrate.
3. Cuticle Care
Our cuticles are often overlooked. Before we know it, we have torn skin, cracks and tears causing soreness and sometimes even infection. The health of our cuticles are essential for optimal nail health. While your hands are still warm, take a Q tip or orange stick, dip it in some oil (coconut, olive, almond, castor) and gently push around your cuticles in a downward action. Wipe any excess oil off with a tissue or cotton wool.
4. Clip, File and Buff
Now that your hands are beautiful and soft, it’s time to treat your nails. Clip or cut your nails if needed and then file to desired shape and length.
This next step is my favourite and definitely the secret to restoring nails to being strong and healthy. If you haven’t ever used a 4 Way Shiny Block / 4 Step Buffing Block Shine Nail Buffer now is the time.
These little tools were one of the lifelines for my brittle and weak nails and here’s why – the key to strong and healthy nails is blood circulation. The more blood circulation occurs under the nail bed the stronger and healthier your nails are going to be.
Here’s what they do:
Smooth out ridges and bumps
Increase circulation under the nail bed
Buffing provides the optimal surface for nail polish to adhere to
Here’s how to use them:
Most buffers have their sides marked with Step 1, 2, 3 & 4. Step 1 smoothes out the ridges, Step 2 Buffs the surface and 3 Polishes and Shines. Step 4 is sometimes optional file or added shine.
Your nails will look amazingly shiny and polished – so good that they won’t even need nail polish.
5. Internal supplements – last but not least, healthy nails and skin is not just about external treatments but internal support as well. Taking oil supplements will help with any skin allergies or sensitivities as well as provide nourishment to the organs that will feed the skin, hair and nails.
Some of the best oils for skin and nails are Vitamin E, Fish oil, Evening primrose oil,
Coconut oil, Healthy fats (avocado, butter) and Bone marrow.
6. Night time hand cream and glove treatment – deep moisturising
Sleeping is one of the best aids for beauty. When your body goes into sleep mode it has a chance to recoup and recover which is the best time to give your hands and nails a bit more intensive loving. Finish off your hand and nail therapy session with a coat of body butter, massage lightly and pop on a pair of cotton gloves or socks. When you wake you will have hands that are rejuvenated and beautiful – so beautiful that you probably won’t want to do the washing, cleaning or cooking etc etc.
Here’s my favourite recipe for a hand/body butter.
Stay tuned for the ginger, fennel and coconut biscuit recipe.
6 Steps to Beautiful Hands and Nails
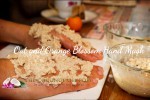
A quick and easy hand masks perfect for dry and cracked skin.
- 3 tablespoons rolled oats
- 3 tablespoons rose water/orange blossom water
- 2 tablespoons sweet almond oil or coconut oil
- Bullet blender or mini food processor
- Blitz the rolled oats into a meal then add the rosewater and the oil.
- Warm it gently in the microwave or in a double boiler.
- Making sure that mask is not too hot, apply it to both your hands and fingers.
- Wait for mask to fully cool and then scrap it off your hands and wash with warm water.
6 Steps to Beautiful Hands and Nails

Food for your hands – this mask speaks Yum to dry itchy skin!
- 3 tablespoons Castor Oil
- 1 tablespoon Olive oil or Coconut oil
- 1 tablespoon lemon juice
- Stainless steel bowl big enough for hands to fit
- Saucepan
- Place oils in a bowl over a double boiler or saucepan.
- Fill saucepan with boiling water and let the oils warm up over the boiling water for a few minutes. This should warm the oils to just the right temperature for your hands.
- Remove the bowl and test the temperature. Add the lemon juice.
- Dip nails/hands into bowl and leave them in until oils have cooled (approx 15 mins).
- Wipe hands on a towel and then lightly massage in the oils.
- If needed, rinse hands in warm water and pat dry, carefully leaving a light layer of oil on the hands to penetrate.
How about you? Do you enjoy beauty sessions or manicures? Do you have any tips on your favourite treatments? Would love to hear from you? Leave a comment or share the social love.


